Agronomy Update
Aug 26, 2024
Staying Safe During Harvest
Harvest is a busy time and it can often feel like there aren’t enough hours in the day. Even so, an accident can happen in a heartbeat and we want you and your crew to stay safe during this hectic time.In the latest episode of our ”On The Horizon” podcast, NDSU Farm and Ranch Safety Coordinator Angie Johnson discusses the most common things to watch out for and to have on hand on the farm. Make sure to give it a listen and stay safe out there!
Horizon Resources Agronomy Team

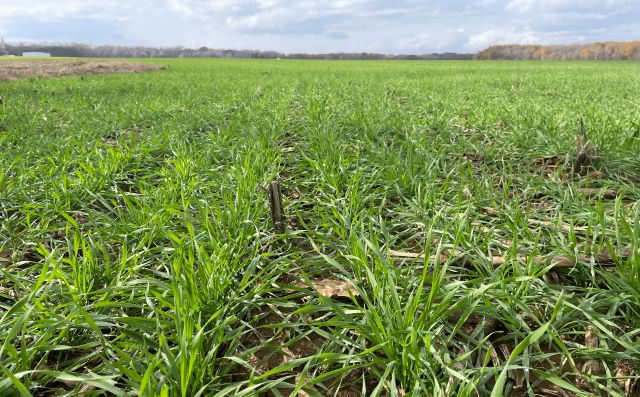
Planning on Planting Winter Wheat?
We’re at the end of August and right now is the opportune time to plan for this fall’s winter wheat. Recommended planting dates in North Dakota are divided into two north-south zones split by highway 200; north of 200 the first half of September is your target planting window and to the south it’s thelatter half of September.
But it’s not as simple as picking the right planting window and putting seed in the ground. The biggest killer to winter wheat is wheat streak mosaic virus (WSMV), this is a virus that’s vectored by the wheat curl mite. Breaking the green bridge is the terminology that is most often used to prevent WSMV because any green grass growing in the field can harbor these mites and if there is any grass, the mite lives on. We may think our fields are void of any green grass come harvest, but I challenge you to think about every hilltop or thin spot you cut over during harvest that potentially had stink grass, foxtails, or barnyard grass. These are the areas that will keep the wheat curl mite alive. To eliminate the chances of immediate infection of WSMV, you want to spray out any grass in the field so there is no host plant for the wheat curl mite. Ideally, you want a week of no green in the field before winter wheat emerges, so plan your glyphosate application and planting dates accordingly.
Good phosphorous fertility increases winter hardiness and spring vigor. The best thing you can do is have soil samples taken right now to determine what your phosphorus level is to know what the right amount of starter you should use is. Another item that you might find important is a good seed treatment, particularly an insecticide seed treatment. There are many choices out there, but I’ve heard plenty of success with those who have used Lumivia CPL. This product seemed to show the most success with grasshopper suppression but also provides some activity on wireworms.
What I want to leave you all with is to plan ahead for this fall seeding; have soil samples taken, break the green bridge by burning down your fields, and consider what pests may impact your stand and make sure you give you seed the protection it needs.
Kyle Okke, Crop Consultant
Fall Fertilizer Applications
Every fall we have this question come up and I will explain the how’s and why’s of fall fertilizer applications of nitrogen fertilizer. Anhydrous ammonia is the easy one, just wait until the soil temps are in the 40’s and start applying. This is normally around mid to late October and will depend on soil moisture almost as much as soil temperature. If we do not have any soil moisture and the ground is hard, it can be pretty tough on anhydrous knives, and you may have problems with anhydrous sealing with the chunks you are making. If you do happen to apply anhydrous too early when the soil microbes are still active, your ammonia will convert to nitrate nitrogen which is leachable in the soil since they are both negative charges. This will be even more pronounced in coarse or sandy soils with less surface area to bind to.Urea as your nitrogen source can be a little more challenging since most of this will be surface applied or broadcast and will be left on top of the soil. This will put your nitrogen at risk of loss to multiple avenues. Urea that is surface applied is subject to volatilization to the atmosphere especially if you have warm, wet and windy conditions. We can add a nitrogen stabilizer to urea to lessen the risk of loss, but eventually you will need moisture to work the nitrogen into the soil profile. Once you apply urea to the soil surface, you will need at least a quarter to a half of an inch of moisture to get it incorporated into the soil.
The second loss risk is that if and when your nitrogen makes it into the soil profile and the soil temperature is still above 50 degrees, the urease enzyme in the soil will convert it to the nitrate form and it will be subject to loss by leaching with any excessive moisture between now and spring. Nitrogen stabilizers will again help with this by keeping the urease enzyme from making this conversion for up to 2 weeks.
Another loss avenue that will pertain to any nitrogen fertilizer that is applied is denitrification which can happen with excessive moisture in the topsoil, and this is mainly pooled water early in the spring. in western North Dakota this is not usually a huge worry since we don’t usually get excessive moisture, but if you have fields that do not drain well or have areas of the fields that hold water, this will help explain where your nitrogen went if you have done everything the right way to avoid leaching. It might not have gone down into the soil, but instead went up and into the atmosphere.
So, what is the best application method for surface applied urea in the fall? Unless you are using mechanical incorporation and working your urea into the soil profile, which does happen in the Yellowstone Valley quite often, you should wait as late as you can in the fall to avoid nitrogen loss. If you surface apply urea in September, I can pretty much guarantee you will have significant loss if you do not have a rainfall event fairly quickly and even if you do have rainfall, it will convert to nitrate early enough to be subject to loss with winter and early spring moisture. We do quite a bit of surface application of urea in Williston and no matter how tempting it is to just get your equipment out in the field early when the weather is still nice, we always wait until the soil temperature is low enough and the conditions are lessened for nitrogen loss. Normally this will be at earliest late October, and we normally do most of our fall spreading in November preferably close to either rainfall or even snowfall. When you drive around in late June and early July and see fields that are a light green color or even get a tint of yellow, a lot of times those fields were spread with fertilizer way too early in the fall and they have been subject to loss already.
Besides nitrogen loss, be aware that you can and will also have nitrogen tie up. Fertilizer is never 100% efficient and you will have some nitrogen tie up with residues in your soil. If you don’t spread out your residue behind your combine very well and you surface apply urea, you can see where this nitrogen has been tied up with that residue throughout the growing season and possibly the next season or even for a few seasons. That can explain that light green strip that is about 10 ft wide in your fields that matches up with your combine. Make sure to manage your residue to reduce tie up.
Fall applications of nitrogen can really help spread your workload out and normally fall prices are a little lower than spring prices, so it can be a really good practice. Make sure you are good with your timing of whatever nitrogen source you are using and don’t let your brother take out the spinner spreader or let your agronomy dealer start spreading too early to make their lives easier at your expense. Inputs are expensive so you don’t want to lose what you put into the soil, but nitrogen is by far the best investment you can make in your farming operation. You will get more return on your money with nitrogen versus any other inputs costs every year, no matter the cost of the fertilizer.
John Salvevold, Agronomy Division Manager, CCA